Google Drive uploads not converting into Google Docs? Here’s how to fix it!


A lot of customers on the Google Drive and Google Docs platform have some warranted misconceptions as to how files are treated, especially when they are uploaded (Word files, for example.) Ever since Google re-branded Google Docs as Google Drive, there have been some lingering question marks as to how files are treated, and how to convert them properly for the format desired.
First off, how does file uploading affect your storage quota? The concept is pretty simple, and while Google goes over it in anofficial support document, here are the basics you need to know:
- For any Microsoft Office files uploaded: these affect your 5GB storage quota (higher if you purchased additional space)
- For native Google Docs files you create: these have no effect on your storage quota (there is no limit, as far as Google advertises). Remember, Google Docs files include Docs, Spreadsheets, Presentations, Drawings, and Forms created from the online Google Drive interface.
Now that we have space questions cleared up, you may be curious as to how you can adjust your file upload settings. For example, many customers we work with like to work within Word and create their initial files (in .docx format) and then upload these documents into Google Drive, and have them converted into Google Docs files for native online editing, collaboration, and sharing capabilities.
As an example, I am going to show how you can create a Word file on your computer and then upload it into Google Drive as a native Docs file. Here is the full step by step process:
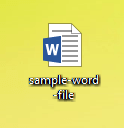
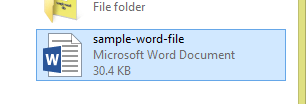
1) Create your initial file on your MAC or Windows computer. Since using the web interface for Google Drive doesn’t care if you use either platform, there are no ecosystem limitations here. If your copy of Word can create .doc or .docx (even .rtf files for that matter) then they CAN be uploaded and converted into Google Drive.
2) Log into your Google Drive account. Remember, no matter if you have a plain Gmail account, a free Google Apps free edition account, or a full paid Google Apps for Business account, all of these services come with access to Google Drive.
3) Click on the upload button next to the create button, and select “Files”. This is probably the easiest part of the process. No matter what kind of file you are trying to upload, you need to merely find it on your local computer or a network share you may be using. Once you have found the file, simply highlight it and select Open.
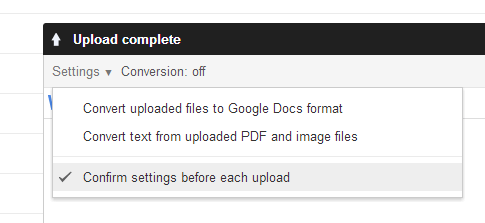
4) By default, Google Drive will want to upload the file without conversion. This is of no help for us – we can’t edit native Office files in the Drive ecosystem, and therefore we need to change a simple setting. On the lower right hand corner of the screen, where the Upload Status window shows, we need to click on the “Settings” button and then select “Confirm Settings before each upload.” This simple selection will force Google Drive to ask us what we want to do with each upload.
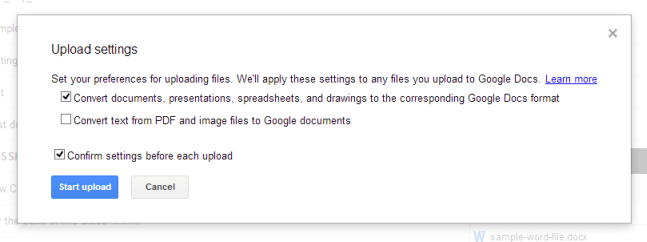
5) Let’s re-try our upload with the same file, and tell Docs to convert the file this time. Since we changed the necessary setting in the last step, Drive will now present us with a nice prompt that asks the simple question: are we keeping the files as Office format, or are we converting into Docs? There are two possible settings here. The upper option pertains to traditional Office files (Word, Excel, PowerPoint) and the second option is for PDF files you wish to upload. Yes, Google Drive has excellent OCR capability!
6) Once you finish the upload, you should see a new Google Doc created. It should have the same name as the Word file you uploaded. The key to checking if the process was done right is to see if the icon next to the file name has the Google Docs image icon. If so, mission successful! The file is now in Docs format, and you can open/edit/share the file and continue working in the online interface with all the benefits it provides.

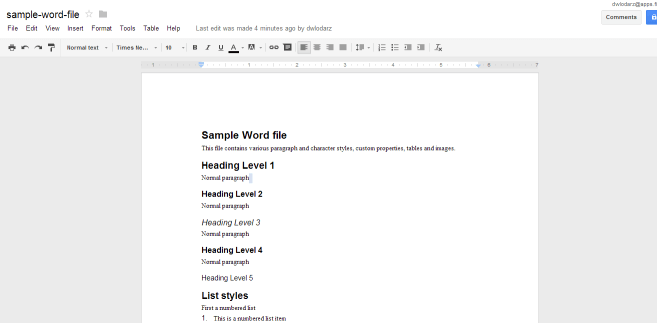
7) If you click on the file, you should have full Google Docs editing rights. I went into my sample Word file in Google Docs just to ensure everything converted properly. Indeed, the file now displays the complete Docs editing bar and I can start working in the online interface, share my document, email it, etc.
That’s about it! If you followed all of the above steps correctly, you now have a file you can work with in native Google Docs format and take advantage of all the great things that Docs provides. The beauty about setting the option in step 4 is that now you will be prompted upon each upload into Drive, and you can select what you wish to do. This provides you with the flexibility to be able to upload native Office files and keep them in their original format, or upload straight into Docs format. The choice is up to you.
